将 150 篇文章发布到您的 WordPress 网站只需要不到 30 分钟,而且全部上线不应超过 1 小时。
除了我们需要一个 Openai API 密钥之外,这是100%免费的方法。但您可以获得价值 5 美元的免费试用(这个免费的已经没有了,可以考虑用中转)。
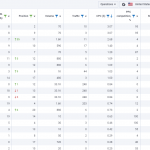
我们使用 ahrefs 免费工具 – https://ahrefs.com/keyword-generator 创建了 150 个关键词。
我们在 Google Colab 中粘贴了一些代码。
为了安全起见,请确保不要将您的 Google Colab 设为公开。默认情况下它应该是私有的。
这段代码只负责通过 Openai API 创建文章并发布到您的 WordPress 网站。
让我们开始吧。
1. 前往 https://ahrefs.com/keyword-generator 并添加任何您想要的关键词。确保像这样精确地选择关键词和问题,然后将它们粘贴到一个文本文件中。

直接把关键词复制到txt文件里面,虽然有点混乱,但我们将使用 Python 进行整理一下(下面会提供代码)。
2. 现在我们需要创建自己的 Google Colab 笔记本(也是100%免费使用的)。
前往 https://colab.research.google.com/ 并点击“新建笔记本”。

然后,我们只需要添加几行代码,创建文件,然后就可以开始了。

在第一行添加以下代码以安装 OpenAI:
!pip install openai --quiet
将以下代码添加到第二行,它会整理关键词并包含所有函数:
def gpt_chat(all_params):
the_keyword,the_prefix,the_temperature,the_max_tokens = all_params
the_text = the_prefix + the_keyword + ":"
#the_text = the_prefix + the_text
response = openai.ChatCompletion.create(
model="gpt-3.5-turbo",
messages=[{"role": "user", "content": the_text}],
temperature=the_temperature,
max_tokens=the_max_tokens
)

the_result = response["choices"][0]["message"]["content"]

return the_result

def fix_ahrefs_keywords(file_with_keywords):
#remove empty lines and non keyword lines from output of https://ahrefs.com/keyword-generator
with open(file_with_keywords, 'r') as fyl:
lines = fyl.readlines()

good_lines = []
for aline in lines:
aline = aline.strip()
if (not any(str.isdigit(x) for x in aline) or len(aline.split())>3) and not aline.strip()=="" and not "Sign up" in aline and not "N/A" in aline:
good_lines.append(aline)


with open(file_with_keywords, 'w') as f:
for line in good_lines:
f.write(f"{line}\n")

#load file with your keywords
file_with_keywords = "sample_data/keywords.txt"
#this step fixes the file with keywords from https://ahrefs.com/keyword-generator
fix_ahrefs_keywords(file_with_keywords)
接着,把下面代码添加到另外一行里面:
# SETTINGS
begin_index = 11
end_index = 12
your_site = "yur site url"
your_user = "your site username"
your_password = "your site application password"
wordpress_category = "" # or you can add here a category id
title_is_keyword = "yes" #cam be "yes" or "no". If yes then the title is the keyword, if no then the title is created by GPTCHAT
remove_ai_detection = "no"

#prefix = "Write an article about"
prefix = "Write a very extremelly long and detailed article about "
#load the fixed keywords
with open(file_with_keywords, 'r') as fyl:
keywords = fyl.readlines()
keywords = [x.strip() for x in keywords]

#now we create posts using GPT-chat and post them to our wordpress site
for e,akeyword in enumerate(keywords):

if e<begin_index or e>=end_index:continue #this makes sure we only add article from begin to end
the_temperature = 0.7
the_max_tokens = 2000
all_params = akeyword,prefix,the_temperature,the_max_tokens
print("we are writing post #",e,", using keyword:",akeyword)
gptchat_article = gpt_chat(all_params)
title = akeyword.title()

try:
gptchat_article_list = gptchat_article.split("\n")
if gptchat_article_list[0].count(".")<=1 and gptchat_article_list[1].strip()=="":
title = gptchat_article_list[0]
gptchat_article = gptchat_article.replace(title,"").strip()
if title_is_keyword=="yes":
title = akeyword.title()
except:pass


#now we post to out wordpres site
try:
the_response = make_post(title,gptchat_article,your_user,your_password,your_site,wordpress_category)
the_link = the_response['guid']['rendered']
print("the_link",the_link,"word count",len(gptchat_article.split()),"the_title:",title)
except Exception as err:
print("we have an error",err)

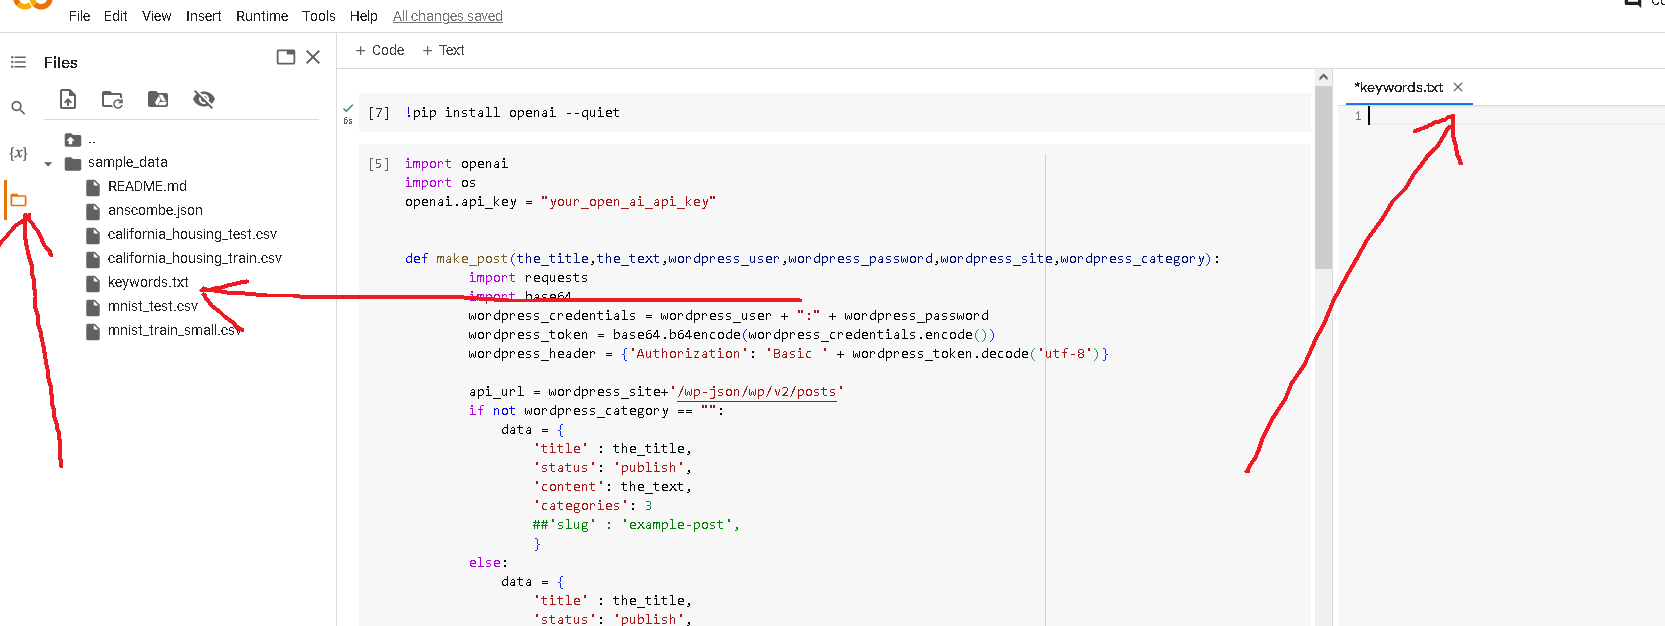
3. 下一步是创建一个保存关键词的txt文件,并粘贴我们已经拥有的关键词。我们点击左侧的文件夹图标,在名为 “sample_data” 的文件夹中创建一个名为 “keywords” 的txt文件。
然后,我们点击 “keywords” 文件,在其中添加我们的关键词。
4. 现在我们只需要添加我们的 WordPress 凭据,然后就可以开始了。

我们进入 WordPress 仪表板中的用户/个人资料页面,然后创建一个新的应用程序密码名称(随便写一个)。这只是密码的名称,我们不会在其他地方使用它。
添加完毕后,我们点击”Add New Application Password”。
这是我们需要复制并添加到 Google Colab 的密码,便于我们用这个密码进行文章发布。
5. 然后添加我们刚刚创建的设置:

要控制你要发布的文章数量,你需要更改 begin_index 和 end_index。例如,如果 begin_index=0 和 end_index=1,那么将只发布前两篇文章。
要发布文章到你的网站之前,你需要在每个单元格中点击“运行”按钮。
现在让我们添加图片发布功能。
使用了 OpenAI API(DALL-E API),收费确实也不贵,可以尝试一下。
以下是主要设置,你可以选择是否添加图片,以及是否将它们作为特色图片,或者只是将它们放在文章的末尾。
DALL-E 生成的图片质量非常好,但有时你需要调整提示来确保创建出您想要的图片。
create_and_add_an_image = “yes” #can be yes or no
make_the_image_featured = “yes” #can be yes or no
image_prefix = “A detailed high quality natural image about: “
image_resolution=”512×512″
如果您选择了 “create_and_add_an_image” 和 “make_the_image_featured”,它将把图片作为特色图片并添加到文章的左上角。
您也可以根据需要从代码中更改。
以下是完整的代码:
#cell 1
def gpt_chat(all_params):
the_keyword,the_prefix,the_temperature,the_max_tokens = all_params
the_text = the_prefix + the_keyword + ":"
#the_text = the_prefix + the_text
response = openai.ChatCompletion.create(
model="gpt-3.5-turbo",
messages=[{"role": "user", "content": the_text}],
temperature=the_temperature,
max_tokens=the_max_tokens
)

the_result = response["choices"][0]["message"]["content"]

return the_result

def fix_ahrefs_keywords(file_with_keywords):
#remove empty lines and non keyword lines from output of https://ahrefs.com/keyword-generator
with open(file_with_keywords, 'r') as fyl:
lines = fyl.readlines()

good_lines = []
for aline in lines:
aline = aline.strip()
if (not any(str.isdigit(x) for x in aline) or len(aline.split())>3) and not aline.strip()=="" and not "Sign up" in aline and not "N/A" in aline:
good_lines.append(aline)


with open(file_with_keywords, 'w') as f:
for line in good_lines:
f.write(f"{line}\n")

#load file with your keywords
file_with_keywords = "sample_data/keywords.txt"
#this step fixes the file with keywords from https://ahrefs.com/keyword-generator
fix_ahrefs_keywords(file_with_keywords)
#cell 2
# SETTINGS
begin_index = 11
end_index = 12
your_site = "yur site url"
your_user = "your site username"
your_password = "your site application password"
wordpress_category = "" # or you can add here a category id
title_is_keyword = "yes" #cam be "yes" or "no". If yes then the title is the keyword, if no then the title is created by GPTCHAT
remove_ai_detection = "no"

create_and_add_an_image = "yes" #can be yes or no
make_the_image_featured = "yes" #can be yes or no
image_prefix = "A detailed high quality natural image about: "
image_resolution="512x512"

#prefix = "Write an article about"
prefix = "Write a very extremelly long and detailed article about "
#load the fixed keywords
with open(file_with_keywords, 'r') as fyl:
keywords = fyl.readlines()
keywords = [x.strip() for x in keywords]

#now we create posts using GPT-chat and post them to our wordpress site
for e,akeyword in enumerate(keywords):

if e<begin_index or e>=end_index:continue #this makes sure we only add article from begin to end
the_temperature = 0.7
the_max_tokens = 2000
all_params = akeyword,prefix,the_temperature,the_max_tokens
print("we are writing post #",e,", using keyword:",akeyword)
gptchat_article = gpt_chat(all_params)
title = akeyword.title()

the_image_url = ""
the_image_id = -1
if create_and_add_an_image == "yes":
response = openai.Image.create(
prompt= image_prefix + akeyword,
n=1,
size=image_resolution
)

image_url = response['data'][0]['url']
image_file = "sample_data/" + str(e)+'.jpeg'
import urllib.request

#download the image to file image_file
urllib.request.urlretrieve(image_url, image_file)

if not make_the_image_featured=="yes":the_image_id = -1

try:
the_image_id,the_image_url = upload_image(image_file,your_site,your_user,your_password)
print("image_url",the_image_url)
except Exception as error:
print("we could not upload image",error)

try:
gptchat_article_list = gptchat_article.split("\n")
if gptchat_article_list[0].count(".")<=1 and gptchat_article_list[1].strip()=="":
title = gptchat_article_list[0]
gptchat_article = gptchat_article.replace(title,"").strip()
if title_is_keyword=="yes":
title = akeyword.title()
except:pass

if not the_image_url.strip()=="":
if make_the_image_featured=="yes":
image_insert_html_code = '<img src="'+the_image_url +'" alt="'+akeyword+'" style="float: left; margin-right: 10px;">'
gptchat_article = image_insert_html_code + gptchat_article
else:
image_insert_html_code = '<img src="'+the_image_url +'" alt="'+akeyword+'" style="margin:10px;">'
gptchat_article = gptchat_article + image_insert_html_code


#now we post to out wordpres site
try:
the_response = make_post(title,gptchat_article,your_user,your_password,your_site,wordpress_category
,the_image_id
)
the_link = the_response['guid']['rendered']
print("the_link",the_link,"word count",len(gptchat_article.split()),"the_title:",title)
except Exception as err:
print("we have an error",err)
以上是今天分享的一个用AI写文章同时发布到自己wordpress网站上面的python脚本。
虽然,谷歌算法更新打击了很多AI内容站,包括我自己在内,好几个表现不错的AI网站都被打击了,但是,还是可以尝试一下。
比如,我之前说了非英语国家的内容站,目前确实可以尝试。
还有一点就是,AI生成的内容一定要手工编辑校对,控制每天文章发布数量,AI站还是有机会的。
有需要的小伙伴可以去尝试一下,当然以上都是一些示例,可以根据自己的需求,自己做简单修改。